Baby Announcement Ideas: Little Details for a Beautiful First Photo
Six ways I’d style a first baby announcement photo, with our 3D balloon and round teddy plaques, gentle window light, simple outfits and personal details. Includes a shot list, caption ideas and practical finishing touches.
In this guide

I’d rather keep a photograph with a slightly wrinkled sleeve and a little hand in the corner than spend the whole moment trying to make everything perfect.
For a first baby announcement photo, I want the name to be easy to read, the light to feel soft and the picture to look like it belongs to that family. A plain outfit, a familiar blanket and one personal detail can do a lovely job.
The wooden balloon is my starting point here: a baby announcement with a raised first name, engraved extra names and a ribbon. I also like the round teddy design when I want a more compact shape. Below, I’ve put together six arrangements, the small camera adjustments I’d try and the checks that make the photograph easier to take.
There is no deadline for this picture. It can be an outfit photo before the birth, a quiet family photograph later or a name reveal without showing your baby’s face.
How I’d set up the light, background and phone
Find gentle window light
I’d look for a bright spot beside a window, away from a sharp patch of direct sun. With the light coming from one side, the raised wooden letters can cast a small shadow that makes their shape easier to see.
If the window is behind the subject, the plaque may look dark. I’d move around so the light reaches its front, then take another test photo.
Keep the background quiet
For an outfit flat lay, I’d choose one plain cloth or an uncluttered section of table. Cotton, linen and a simple knit give me different textures without needing several patterns.
I’d move away anything that competes with the name: a bright label, a patterned bag or a second prop that has its own big message.
The phone settings I’d try first
I’d wipe the lens, open the ordinary camera and start at 1× rather than the ultra-wide setting. Moving the phone back a little often gives a more natural view of the plaque than pushing the camera close to it.
I’d tap the name to focus, then check the picture before changing anything else. If the cream fabric looks washed out, I’d lower the brightness slightly using the camera’s exposure control. I’d also compare a shot with the room lights off if they are giving the wood an orange tint.
For a plaque with a ribbon or fine lettering, I’d take a normal photograph before trying portrait mode. Some phones blur the edges of objects, so I’d look carefully around the lettering and ribbon rather than assume the effect has worked.
Before the real picture, I’d take one photograph of the empty arrangement. It is much easier to notice a distracting plug socket or a clipped-off ribbon when I’m only looking at the setup.
Start with the first outfit and a balloon plaque
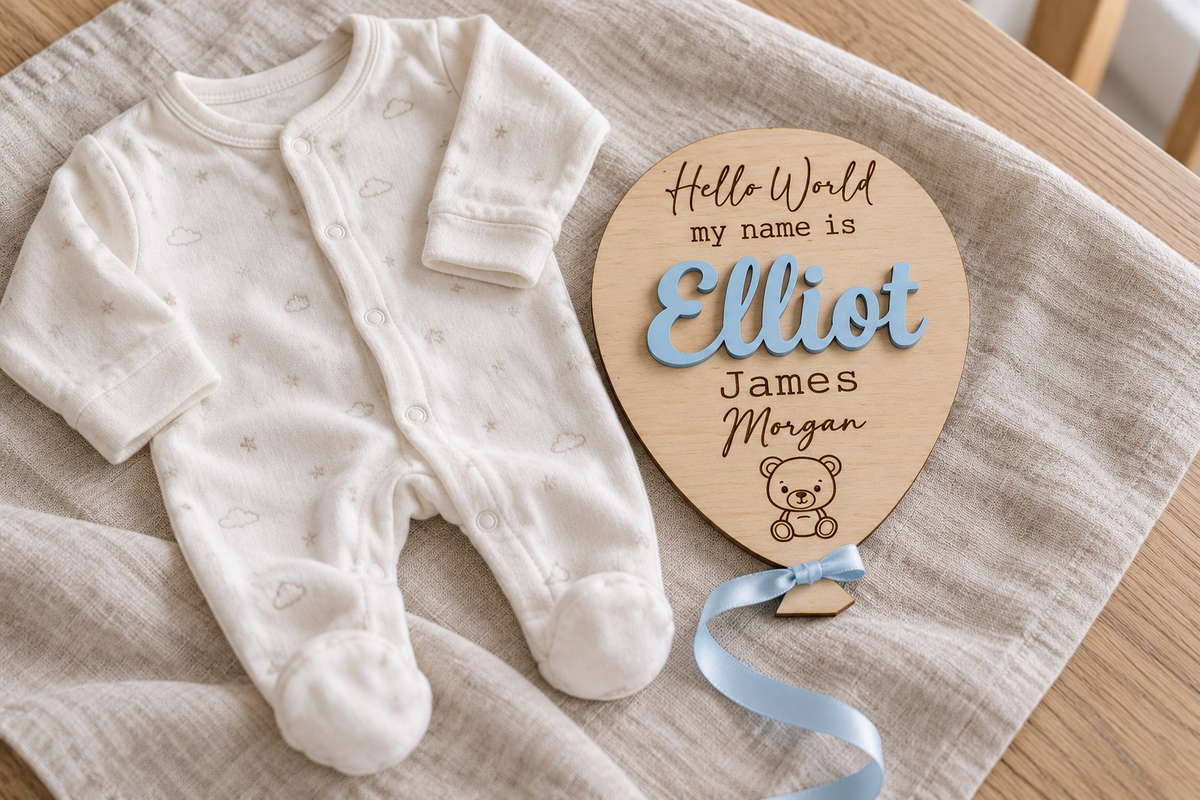
The arrangement at the top of this guide is the one I’d use when I want a name reveal without organising a family photograph. The outfit tells part of the story, and the balloon brings the name into focus.
I’d lay the sleepsuit flat, leave a little space beside it and position the balloon so its whole outline is visible. The ribbon can make a gentle curve across the cloth, rather than a tight curl around the lettering.
- Put the outfit down first. Smooth the largest folds, but leave the fabric looking like fabric.
- Add the plaque beside it. Keep the raised name facing the light and leave space around the balloon’s little knot.
- Take the picture from above. I’d use a stable position with both feet on the floor, then check that the phone is reasonably parallel to the arrangement.
My first crop would include the whole sleepsuit. Then I’d move closer for a second version that shows the name, a sleeve and a small section of ribbon. It gives me two pictures from the same setup.
One plain outfit+one balloon plaque+a simple cotton background
Pair the round teddy plaque with a favourite knit

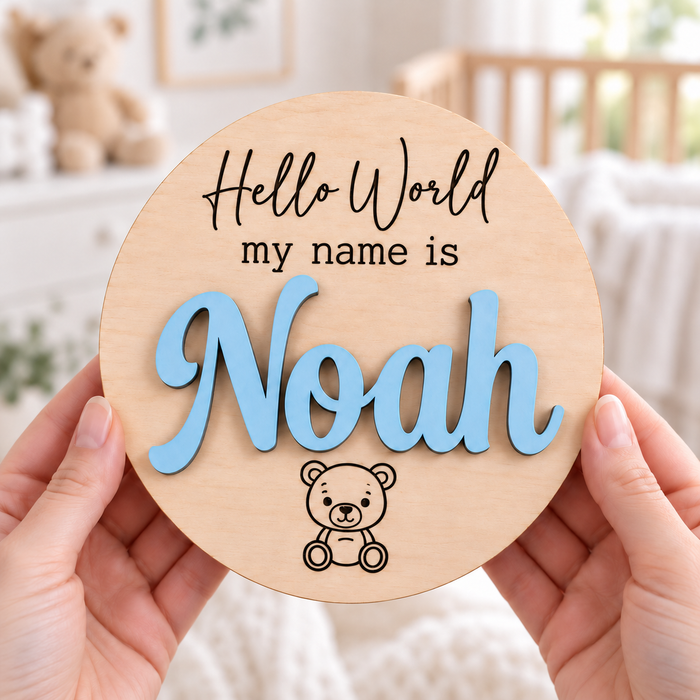
For a softer-looking baby announcement, I like the round teddy plaque beside a cream cardigan or a folded muslin. I’d keep the teddy on the plaque as the character detail, so I don’t need to add a large soft toy as well.
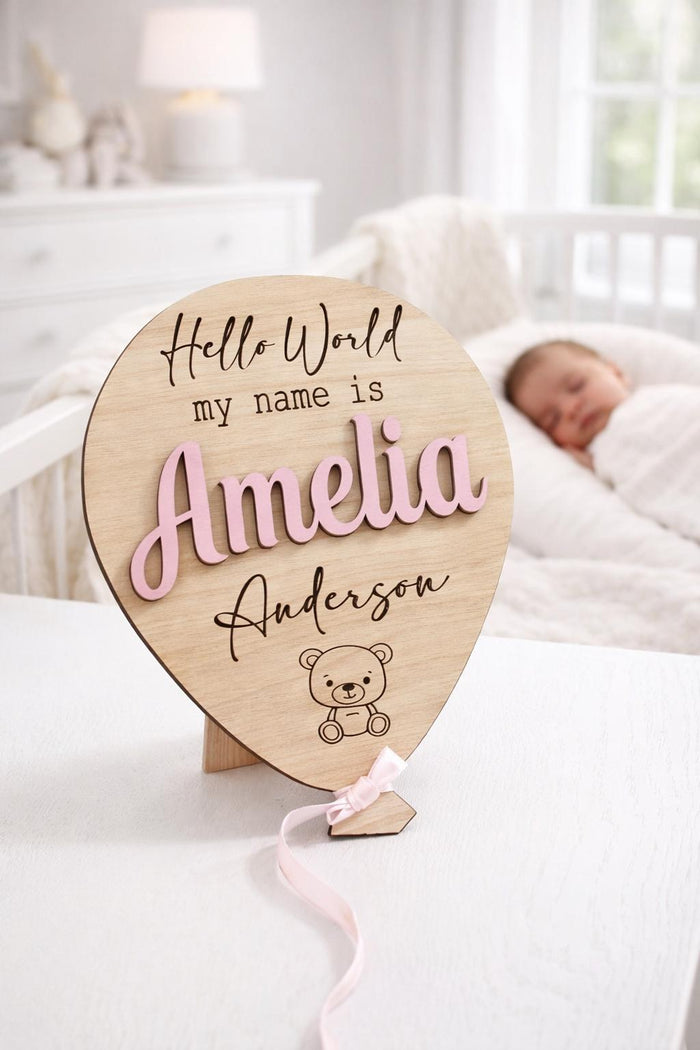
In this example, the pink lettering and rose cloth sit together, while the cream knit gives the picture some breathing room. I could use blue, white, beige or another available name colour and make the same arrangement work.
I’d avoid laying every object in a perfect row. A cardigan sleeve partly outside the frame can make the composition feel more relaxed, provided the name and engraved wording remain easy to read.
For a first-name-only version, I’d leave off the extra engraved name when ordering. If I wanted a middle name or surname, I’d put it in the separate field rather than assume it will be made in raised letters too.
Let a parent’s arms be the setting

I like a family photograph where the person holding the baby is allowed to look at them. Nobody needs to look straight into the camera for the picture to feel connected.
I’d get the parent comfortable first, with the baby’s head and body fully supported. A second adult can hold the balloon beside the parent, away from the baby, while the photographer finds a crop that includes both the name and the cuddle.
The adult holding the plaque can tilt it slightly until the lettering catches the light. I’d check that their fingers aren’t covering a name and that the ribbon falls away from the baby.
I’d take one wider photograph that includes the parent’s face if they want to be shown, and a closer version focused on the arms, outfit and plaque. Both can become keepsakes; only the family decides which one they want to share.
Make a little-details picture without showing a face
A first announcement can be a name, a tiny sleeve and a parent’s hand. I’d choose this approach when I want to keep the photograph personal without making it a full portrait.
One option is to photograph the baby’s hand resting in a parent’s supported hand, then take a separate picture of the plaque. I can place the two photographs next to each other in an album or share them as a pair.
Another is a close crop of a baby already held comfortably by a parent, with a second adult holding the plaque clear of them. I’d keep the pose as it is and adjust the photographer’s position, rather than move the baby just to fit the sign.
“I’d keep one picture just for us, and choose a separate crop for the announcement.”
Before posting, I’d look at more than the face: a full surname, hospital wristband, paperwork or the view through a window may show details I hadn’t meant to share.
Include a sibling through the things they choose
For a sibling announcement, I’d give the older child a small job before the baby joins anything: choosing a cardigan, drawing a welcome card or deciding which family photograph goes beside the new one.
An outfit-only flat lay can show a larger sibling’s T-shirt, the baby’s sleepsuit and the name plaque. I’d leave enough space between the clothes for the difference in scale to be clear, and keep the writing on the plaque upright.
If the child wants to be in a photograph, I’d keep the baby with an adult and let the sibling sit or stand beside them. Another adult can manage the wooden prop. There is no need for the older child to hold a newborn or a delicate plaque to make the picture meaningful.
A little contribution
A hand-drawn “Welcome” card can be photographed on its own beside the name plaque.
A picture to keep
I’d save the child’s drawing with the photograph, so their part in the welcome isn’t lost after the announcement.
Make a pregnancy photo and a newborn photo feel connected

I’d connect the two photographs through one repeated detail: the same cream cloth, the same window light or a similar camera angle. The props can change as the story moves from an expected arrival to a name.
For a pregnancy announcement before the name is chosen, a baby-number plaque can sit beside a scan print. After the birth, the balloon or teddy plaque can introduce the first name against the same background.
If I prefer a raised word before the birth, this round pregnancy announcement design offers another starting point. I’d check the exact wording and personalisation options on that listing before choosing it.
I’d also check a scan print for names, dates of birth and clinic details before sharing a photograph online. The keepsake can tell the news without publishing every detail on the original print.
The pair doesn’t have to match perfectly. Keeping just one colour or texture the same is enough for me to see the connection when the photographs sit together.
Would I choose the balloon or the round teddy?
I’d start with the outline I want in the picture. Both designs have a raised painted first name and engraved details; the difference is how the shape works with the rest of the arrangement.
| The detail | The 3D balloon | The round teddy |
|---|---|---|
| The outline | A taller balloon silhouette with a little knot and ribbon | A circular plaque with the teddy engraved into the wood |
| My first arrangement | Beside a sleepsuit, or held separately in a family photograph | A compact flat lay with a cardigan or folded muslin |
| The colour choice | Name colour and Pink or Blue ribbon selected separately | A painted name against the natural birch background |
| The extra space to allow | Room for the knot and loose ribbon | A little clear space all around the circle |
For the balloon baby announcement, I’d choose Small, Large or XL after measuring the space I want it to occupy. The current wooden sizes are approximately 12 × 14 cm, 15 × 20 cm and 21 × 27 cm, excluding the loose ribbon. The round teddy comes in approximately 12, 17 and 20 cm sizes.
A larger plaque gives the name more room, but I don’t need to fill the photograph with it. I’d leave enough space for the outfit or person beside it to remain part of the picture.
Raised names, engraved names and the colour around them


I’d write the intended layout out before ordering: raised first name, then any extra names to engrave. That keeps the spelling separate from the design decisions.
For the balloon example in this guide, that means Elliot as the raised name, with James and Morgan engraved below. For the round example, it means Mabel raised and Rose engraved. These are styling examples, so I’d use the family’s own confirmed spelling, spaces and capital letters when placing an order.
Both designs currently offer Pastel Blue, Pastel Pink, White, Grey, Brown, Sage Green and Beige for the raised name. On the balloon, the Pink or Blue ribbon is a separate choice. I’d pick the name colour first, then use one small echo of it in the outfit photograph if I wanted the arrangement to feel coordinated.
If the name is still being decided, I’d leave the personalisation until it is confirmed. My baby names guide has more to consider, and the earlier wording ideas cover different ways to introduce the name.
The five photographs I’d try to bring home
I’d keep this list short enough to remember. If the family has only a moment, the first photograph is enough; the others are options for when it feels easy.
-
01
The whole story
A wider photograph showing the outfit or parent, the plaque and a little of the setting.
-
02
The name
A closer photograph where the raised letters and engraved extra names can be read.
-
03
The tiny detail
A sleeve, hand or small item of clothing — with the baby supported as usual, or photographed separately.
-
04
The portrait version
A vertical crop with space above and below the main subject, useful for a phone screen or a printed card.
-
05
The family’s own version
A wider or more personal photograph kept privately, whether or not it becomes the public announcement.
Afterwards, I’d keep the original files as well as any cropped versions. A photograph that looks right in a square post may need a little more room around it when I come to print it.
Simple baby announcement captions I’d use
I’d let the photograph carry most of the detail. These lines can sit beside a first name, a full name or no public name at all.
“Hello, little Elliot. We’re so glad you’re here.”
“A little introduction to our newest person.”
“Mabel Rose. A name we love, for someone we love even more.”
“Our newest little chapter has arrived.”
“One more little person to love. Welcome to the family.”
“Our little one is here. We’re taking some time together.”
I’d add a date or birth details only if I wanted to share them. A short announcement can still feel complete without weight, time, hospital or a full surname.
The small fixes I’d try before adding more props
The name looks dark
I’d turn the plaque towards the window and tap the lettering to focus. Then I’d compare the new picture before changing the background.
The wood looks too orange
I’d try switching off warm room lights and compare a window-lit photograph without a filter.
The picture feels crowded
I’d remove one object and leave a little more space around the name. A tighter collection of props isn’t always a clearer photograph.
The plaque looks stretched
I’d move the phone back, return to 1× and check that the camera isn’t tilted sharply towards one edge.
The ribbon disappears
I’d rearrange it on the empty flat lay and take a wider picture. In a family photograph, another adult keeps it clear of the baby.
The moment has passed
I’d stop. An outfit photograph today and a family picture another day can sit beautifully together.
My final check for a photograph worth keeping
- The name and any extra words can be read in the saved picture.
- The whole plaque is visible where I want it to be, including the balloon knot.
- The background doesn’t contain details I’d rather keep private.
- I have kept an uncropped original.
- The family is happy with the photograph and where it will be shared.
- Every decorative prop is put away after the photograph.
If I’m preparing before the birth, I’d keep the plaque protected in its packaging and photograph the outfit first. My hospital bag guide covers the wider packing list; the photograph can stay a small optional extra.
After the announcement, I’d store the dry wooden plaque with the first outfit or printed photograph, protected against scratches and away from moisture. On display, I’d keep it securely out of a child’s reach.
First baby announcement photos: common questions
Do I need a professional camera?
I’d start with a phone, a clean lens and gentle window light. I’d take a normal 1× photograph, check the focus on the name and keep the original file. That is a practical place to begin before buying any extra equipment.
Does the photograph have to be taken in hospital?
No. I’d choose a time and place that work for the family. An outfit flat lay before the birth, a name reveal at home or a family photograph later can all introduce a new arrival.
Can I make an announcement without showing my baby’s face?
Yes. I’d photograph the name plaque with the first outfit, choose a detail of a sleeve or hand, or pair a separate plaque photograph with a private family portrait. I’d also check any printed names or background details before sharing.
Is the teddy bear raised on the round plaque?
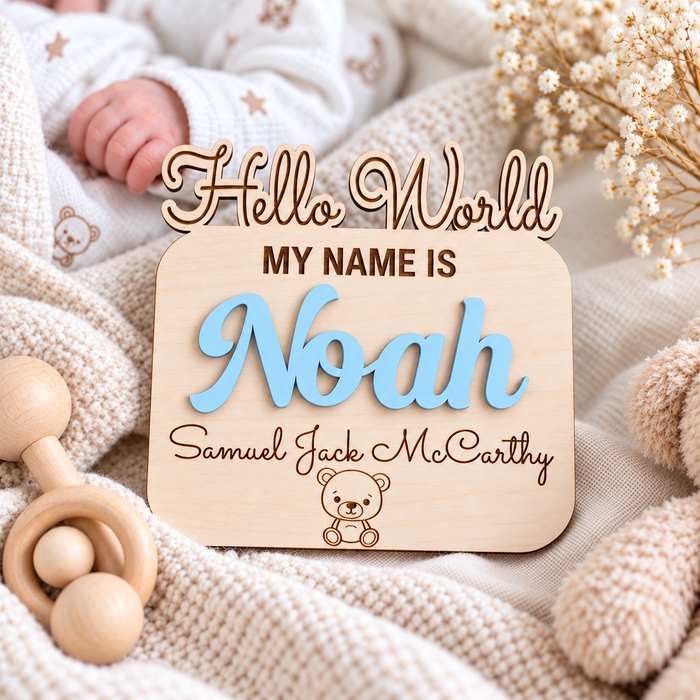
The first name is raised and painted. The teddy bear, greeting and any extra names are engraved into the natural wooden background. On the balloon, the main first name is also raised, with the extra names and teddy detail engraved.
Can I use a plaque before choosing the baby’s name?
For an earlier reveal, I’d choose a pregnancy design that suits the wording I already know, such as a baby number and due month. Some raised-word designs can use Baby and a family name. I’d check the exact listing options and ask about any different greeting before ordering.
Which size works best in photographs?
I’d decide how much of the photograph I want the plaque to occupy, then compare the listed measurements with the outfit or space beside it. A compact plaque suits a close flat lay; a larger one can be easier to feature in a wider family picture. I’d allow extra space for the balloon ribbon.
Can the plaque go in a cot for the photograph?
I keep decorative plaques and ribbons out of a baby’s sleep space. I’d photograph the outfit and plaque separately, or have an adult hold the plaque clear of a baby who is comfortably supported by another adult.
Do I need a different plaque for a boy or a girl?
I’d choose the shape and colour the family likes. Both the balloon and round teddy offer pastel and neutral name colours. On the balloon, the name colour and Pink or Blue ribbon are chosen separately.
Are the clothes and styling accessories included?
No. The product listings describe the personalised wooden plaque and its selected options. Clothes, cloths, scan prints and other styling accessories in the photographs illustrate ways to arrange your own picture.
Leave room for the little person behind the name
I’d choose one arrangement, take a few pictures and let the moment stay small. The name, a familiar piece of clothing and the way someone holds their baby can say plenty.
If I’m choosing a keepsake for the picture, I’d begin with the balloon or round teddy in our baby announcement collection, then build the photograph around the family’s own colours and details.


Join the conversation +